Home > QuickBooks Export
QuickBooks Export
This section is where you manage your settings for how products, customers and orders are exported to Quickbooks.
Please click here to get more information on Quick Books Merchant Service Setup 
Export Products
Products will be exported as "Non-Inventory" items in QuickBooks.
File Name - This is the name of the exported file.
Destination Folder – The folder name that will contain the exported file.
QuickBooks Account Name – Enter the full name of an "Income" account in QuickBooks that exported products will be associated with. For example, merchants may enter "Sales:Merchandise"
Export under a QuickBooks parent – If this option is "Yes", then you will need to enter the full name of a product in QuickBooks that will act as the parent of all exported items. For example, if you create a product called "Online" as the parent, all exported products will be children of "Online".
Include products marked as "Already Exported" – Select "Yes" if you would like to export all products. By default, the export function only exports new items since the last export.
Export Customers
Merchants may use a generic customer account (e.g. "Online Sales") to associate with all online orders. If this is the case, there is no need to export customers to QuickBooks.
Full Name – The name of the exported file.
Destination Folder – The folder name that will contain the exported file.
Include customers marked as "Already Exported" – Select "Yes" if you would like to export all customers. By default, the export function only exports new customers since last export.
Order Export
Products will be exported as "Sales Receipt" items in QuickBooks.
Full Name – The name of the exported file.
Destination Folder – The folder name that will contain the exported file.
Use Generic Customer Account – Enter the full name of a customer that you would like to credit all sales to. For example, if you do not want to export your customers, you may set this generic customer to "Online Sales".
Order ID Range – Enter the start and end order ID for this export. If these fields are left blank, all orders that fit the other criteria will be exported.
Include orders marked as "Already Exported" – Select "Yes" if you would like to export all orders. By default, the export function only exports new items since last export.
Import Data to QuickBooks
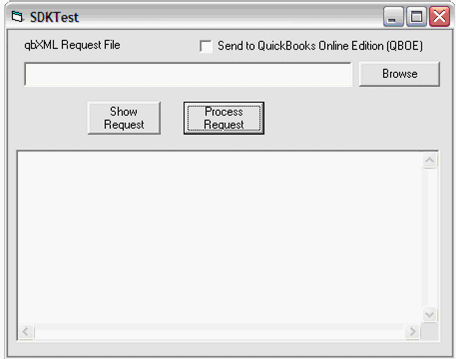
Merchants need to use SDKTest.exe utility that comes with QuickBooks SDK. This file isusually under "C:\Program Files\Intuit\IDN\QBSDK7.0\tools\SDKTest" folder.

Make sure QuickBooks is running and the correct company is opened. Then, select the XML file and click "Process Request" to import data to QuickBooks.
Warning: This process cannot be undone. Please back up your QuickBooks company file first. Also, products and customers need to be imported before orders.
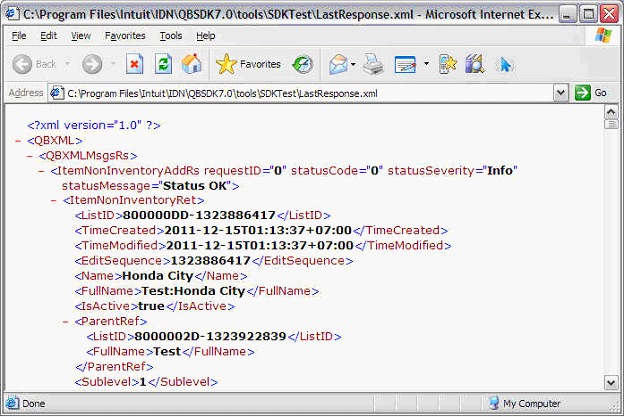
The result of importing will be shown in an XML file as shown below. To verify that all items are imported correctly, you can do a search for the word "Error" in this XML file.

See also

