Using the Sage Peachtree Tool on Product Import
The Sage Peachtree import functionality for Products works as outlined below:
Import Products:
Step-1:
The registered user/member selects his/her Products .CSV file. This file will be generated by exporting the product catalog data from his/her Sage Peachtree Accounting software as presented in the screenshot below.
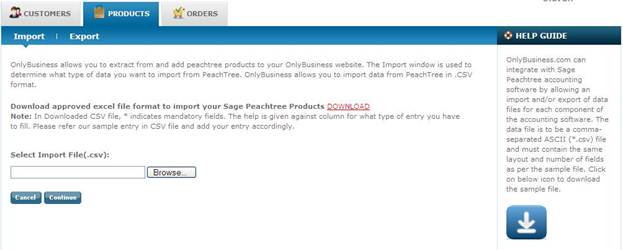
Step-2:
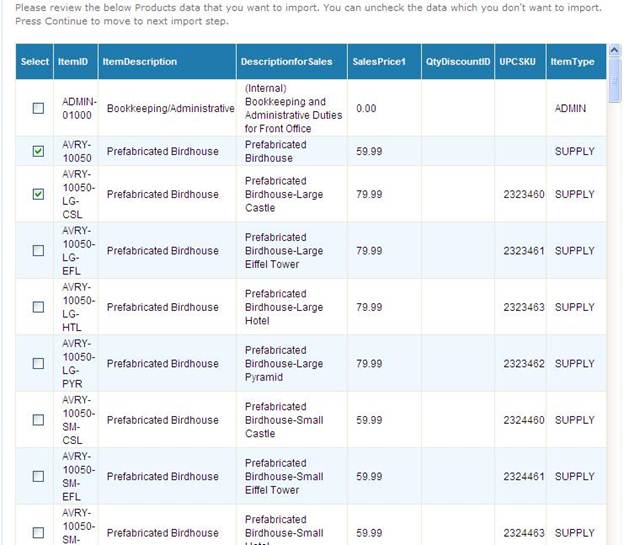
When the registered user clicks on the Continue button, this will result in all of the products to be imported into a product grid as shown below. The user will then have the option to import selected data by checking/unchecking the particular product record.
Step-3:
When the registered user clicks on the Continue button, this will result in the screen below where the user has to then match all of the imported data columns from the Peachtree software infrastructure with the data columns. The left side of this screen displays all of the column names that are taken from the Products .CSV file and the right side displays all of the columns that are used in the products database. The data fields that are the same in both applications are shown as mapped and the columns that are different have to be mapped manually. If the .CSV file contains columns (data fields) that do not have any matched column names with the columns (data fields) within the system, the user would have to select Do Not Import for these columns (data fields) as indicated below.
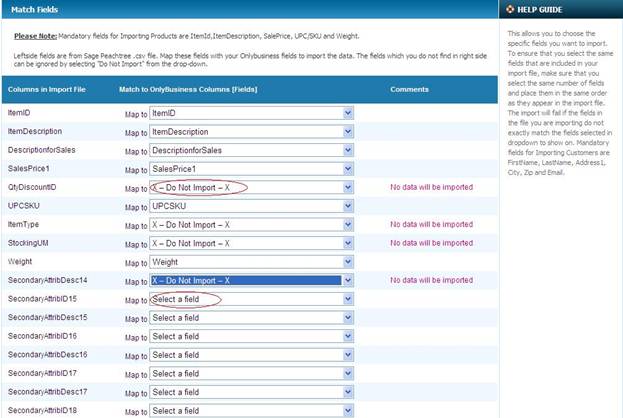
The purpose of this screen to ensure that the user matches the required Sage Peachtree orders columns (also referred to as data fields) which are shown in left side of above screen, to the required and optional products columns (data fields).
Once the user has matched all of the .CSV columns with the columns (data fields), the user can then continue with the import process.
Please Note:
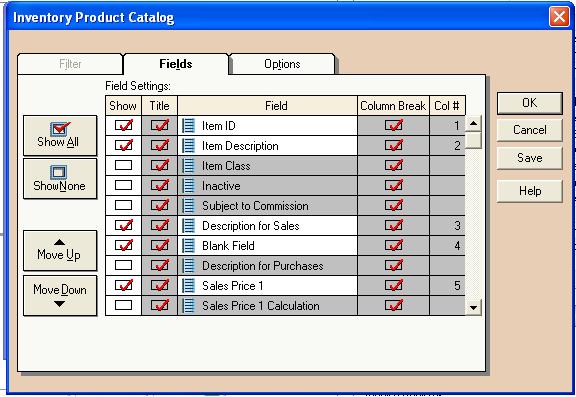
Users who are already using the import / export process within the Sage Peachtree software should not experience any problems in importing data from Sage Peachtree to . Sage Peachtree uses the same process as indicated in the screenshot below from Sage Peachtree. E.g. In the import screen below, the Peachtree user has to select only those columns which are in the .CSV file or this will discontinue the import process.
Step-4:
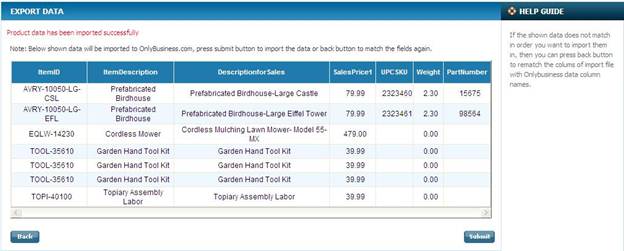
When the registered user clicks on the Continue button, this will result in all of the product to be imported into a product grid as shown below. The user will then have the option to import selected data by checking or unchecking the particular customer record.
Once the data import is completed, a Successful Import message will appear as shown in the screenshot below.
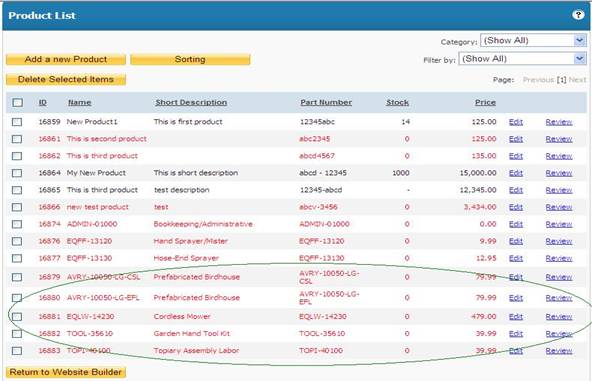
The User can view the imported product data in the list titled Ecommerce Control Panel List of Products, as indicated below:
Export Products:
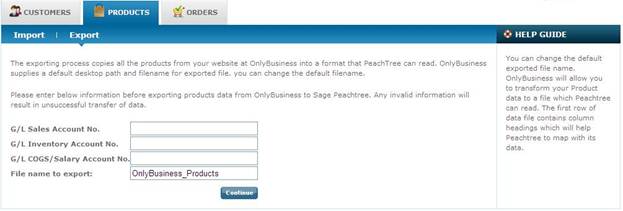
If the user would like to export the products data from his/her account into the Sage Peachtree software, the user would be able to select the export option under the Products tab. The system provides a default name for the exported file which the user can change as required. It is important to note that Sage Peachtree requires the naming device of an G/L Sales Account No, G/L Inventory Account No and G/L COGS/Salary Account No in the imported file along with the other products data which data that is available within the account. Therefore, it is required for users to provide the same file naming devices when exporting their products data from or this will casuse an error in the Sage Peachtree import process. When the registered user clicks on the Continue button, this will generate a .CSV file with all of the products data in a format that Sage Peachtree can read.
